I need to upload some photos to Dropbox but I’m not sure how to do it. I’ve never tried adding them before and don’t want to mess anything up. Can someone guide me through the process?
How to Effortlessly Upload Photos to Dropbox and Manage Cloud Files
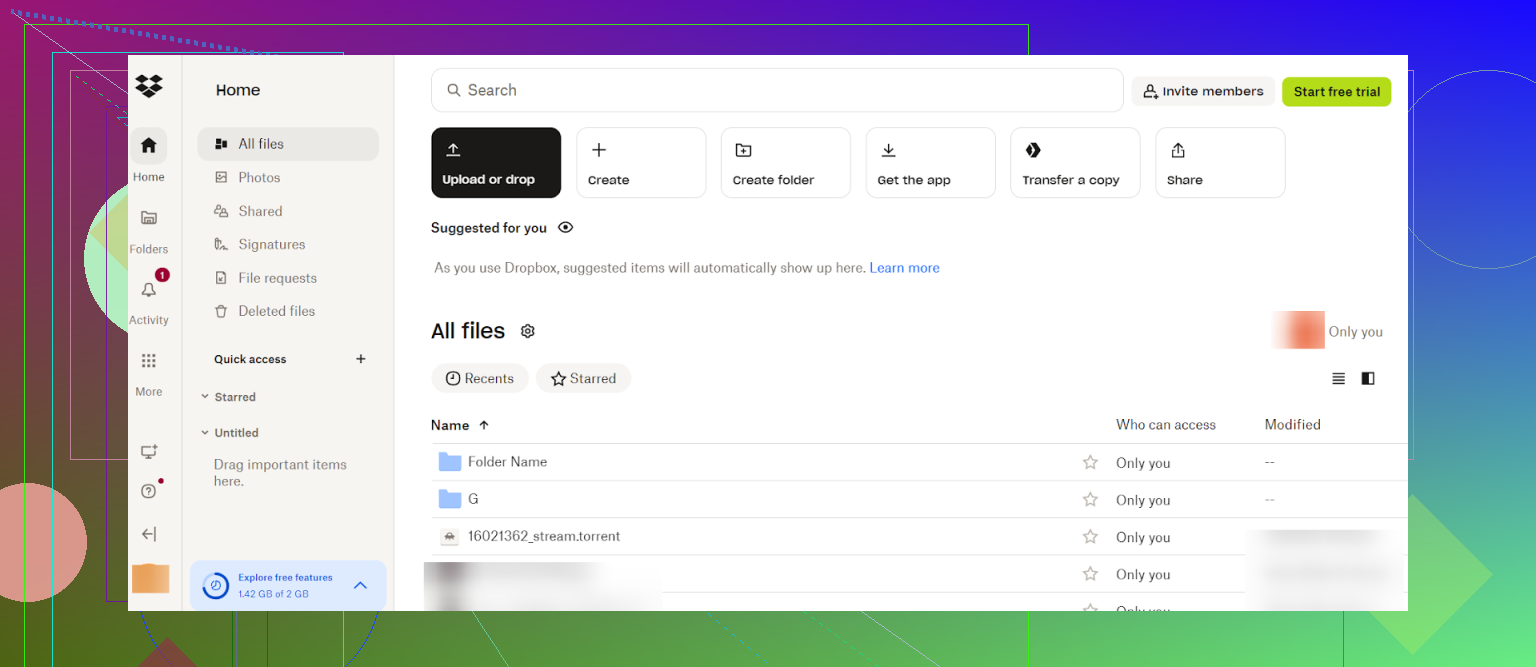
Adding photos to Dropbox is easy, and I do it almost every week to keep my pictures backed up and accessible from anywhere.On my computer, I simply open the Dropbox desktop app, find the files or folders I want to upload, and drag them into the Dropbox folder.
You can also upload photos directly from the website without installing the app. Just go to Dropbox.com, click Upload (or drag and drop your files), select File, choose as many photos as you like, and click Open –simple as that!
Exploring Advanced File Management with CloudMounter
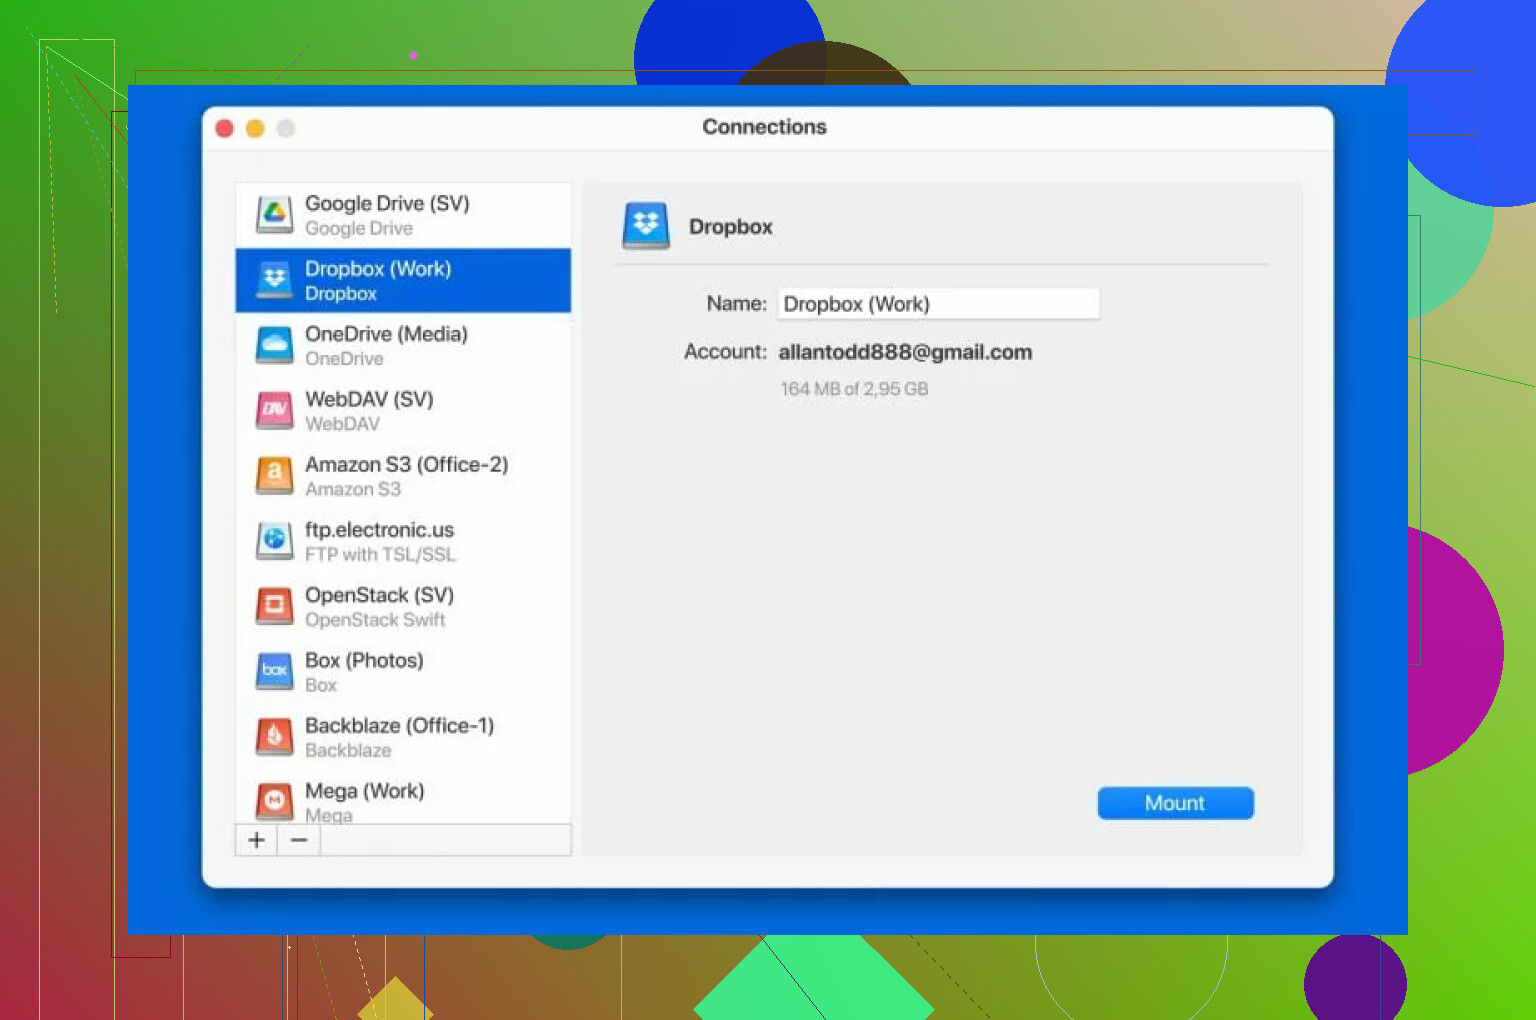
If you’re juggling multiple cloud storage platforms like I am, there’s a tool that revolutionized how I manage my files: CloudMounter. It consolidates all your cloud services (think Google Drive, OneDrive, Amazon S3, MEGA—you name it) in one location. And the cherry on top? Built-in encryption ensures your files stay protected.
Here’s a sneak peek at how CloudMounter looks:
Uploading Photos to Dropbox via CloudMounter
Using CloudMounter to upload files to Dropbox is incredibly straightforward. Not only does it simplify the steps, but it also lets you control everything from a centralized interface. Here’s a quick guide:
- Connect Dropbox: Use your account credentials to sync your Dropbox with CloudMounter.
- Locate Your Files: Open Finder or your file explorer and pick the images you want to upload.
- Choose Your Method:
- Drag-and-drop your files into the Dropbox tab in CloudMounter.
- Or, for keyboard shortcut enthusiasts, try
Command+C / Command+Vto copy and paste files into the cloud storage folder.
That’s all there is to it—a few clicks (or keyboard moves) and your files are good to go!
Wrapping It All Up
Learning how to securely back up your photos to Dropbox isn’t rocket science; it’s something you can master in minutes. Whether you’re utilizing the desktop app, the web browser interface, or using tools like CloudMounter to take control across platforms, you’ll find that syncing your pictures is not only easy but super satisfying.
So what are you waiting for? Give it a try, and I’m confident you’ll nail it on your first attempt!
10 Likes
Uploading photos to Dropbox is like assembling IKEA furniture—looks intimidating but isn’t. Trust me, you won’t “mess anything up.” It’s built to be foolproof, even for first-timers like yourself. Honestly, even Mike over there covered the basics decently (props to that), but let me toss in some extra tips and perspective because why not?
If you’re on your computer and prefer not to mess with apps, do this:
- Open Dropbox’s Website.
- Log in (no brainer, right?).
- Drag and drop your photos directly onto the browser. It’s like magic—they just plop themselves into Dropbox.
Boom, you’re done. But if you’re looking for something a little spicier, why not use a life hack? Ever tried streamlining your cloud storage? It essentially turns your Dropbox into a drive on your desktop, plus you can sync other cloud services. Handy if you juggle between Dropbox, Google Drive, and whatever else everyone’s hoarding pics on these days.
Oh, and hey, if you’re uploading from your phone, use the Dropbox mobile app. It’s almost too easy: just tap, upload, and go sip your coffee while it backs up. Painless.
Side tip: Think twice about enabling automatic uploads if you don’t want everything on your phone dumped into the cloud (looking at you, 15 accidental screenshots). Choose your photos manually, maybe.
Lastly, PRO TIP: Organize your folders before dumping stuff in Dropbox. Dropbox can turn into a black hole of disorganized files if you’re not careful. Sort your photos by date, event, or subject—it’ll save you a headache later.
Got all that? Cool, now get uploading before procrastination wins the battle.
Uploading photos to Dropbox isn’t exactly climbing Mount Everest, but hey, we’ve all been there, staring at the screen wondering if dragging and dropping something into the wrong place will set the computer on fire.
Here’s what I personally like to do, which slightly deviates from what @mikeappsreviewer and @hoshikuzu laid out (solid advice there, by the way, even if it’s a tad over-explained in spots). If you’re not up for apps or third-party tools, just keep it simple with your web browser:
- Open Dropbox in your browser.
- Log in (yes, it’s obvious, but someone would call me out if I skipped this step).
- Click on the “Upload” button—usually a big ol’ icon that’s hard to miss.
- Select “Files” or “Folder,” depending on how organized (or not) you’re feeling today.
- Navigate to where your photos are and upload them. That’s it. No rocket science, no drama.
However, if you’re dealing with a ton of photos across multiple platforms—like trying to sync from other cloud services—do yourself a favor and check out streamlining your cloud storage. It essentially combines all your cloud services in one place. Imagine Dropbox, Google Drive, and others hanging out in a single, tidy interface. Plus, bonus points for encryption to keep all your questionable photos and files safe.
Side rant: If you’re using the mobile Dropbox app, for heaven’s sake, don’t enable automatic photo uploads unless you want every accidental screenshot, meme, and blurry picture of your cat clogging up your storage. Be selective. Trust me.
And please, organize those photos into folders—date, event, topic, whatever. Nobody wants their Dropbox turning into a chaotic black hole of “IMG_3639.jpg” floating around aimlessly. Future You will write me an actual thank-you card for this advice.
That’s all. Straightforward, right? You’ve got this.
Not to sound like a Dropbox snob, but while the methods shared by others are solid, they’re a bit too… let’s say ‘complicated’ for my taste. I’m all for keeping it as low-maintenance as setting up Netflix. Here’s my take for getting those photos uploaded without a headache:
-
Use Desktop Mode: If you’re on a computer, just copy or drag files straight into the Dropbox folder. You don’t need to overthink it—Dropbox syncs automatically. Bonus points: you can organize as you go or toss them in and sort later.
-
Skip the Fancy Tools Unless You Need ’Em: CloudMounter seems like a total win (encryption and multiple cloud management sound great), but unless you’re drowning in files from fifty apps like Google Drive, OneDrive, Dropbox, and more, do you really need it? Adding another layer might be overkill for a lot of users. Sure, it’s powerful for multi-service users, but if Dropbox is your one-stop cloud shop, why add more complexity? Pros: convenience, encryption. Cons: unnecessary if Dropbox already does enough for you.
-
Mobile Uploads: If you’re uploading from your phone, let me save you some time. Install the Dropbox app, open it, and use the “+” button to upload photos. Just beware of smashing “enable auto-uploads” because your storage WILL cry under the weight of memes, screenshots, and blurry dog close-ups.
-
Online Sync: If you, like me, don’t want five apps competing for attention on your device, stick to the Dropbox website. It’s clean and does the job: login, click upload, and move on with life. Don’t overthink this.
Now, while the competitors here delved into fancy tools and advanced setups (yes, insights for some, but intimidating for beginners!), my advice is this—if you’re not managing photos across multiple platforms daily and don’t care much about encryption add-ons, simpler is almost always better. Anything beyond straightforward uploads? That’s a topic for when you’re leveling up your cloud game, IMO.
To cap it off: Focus less on tools or “what if I mess up?” paranoia and more on sorting your pictures into folders while uploading. Do Future You a favor—organize while you upload. Done and dusted. Less drama, more online photo zen. ![]()