I’ve been creating AI-generated photos, but they still look fake with odd skin texture, lighting, and details that make them easy to spot. I need help figuring out what settings, prompts, editing tips, or tools can make AI images look more realistic and natural for better results.
If you want AI portraits to pass as real, the input photos matter more than people think. I got better results once I stopped feeding the app random camera roll junk and used a tighter set of selfies instead. Clear photos help. Recent ones help more. Natural window light did the most for me. I used front, three quarter, and side angles, kept my face relaxed, and skipped anything with filters, sunglasses, motion blur, or weird night lighting. If your source shots look off, the output keeps those mistakes. Bad skin smoothing in, bad skin smoothing out.
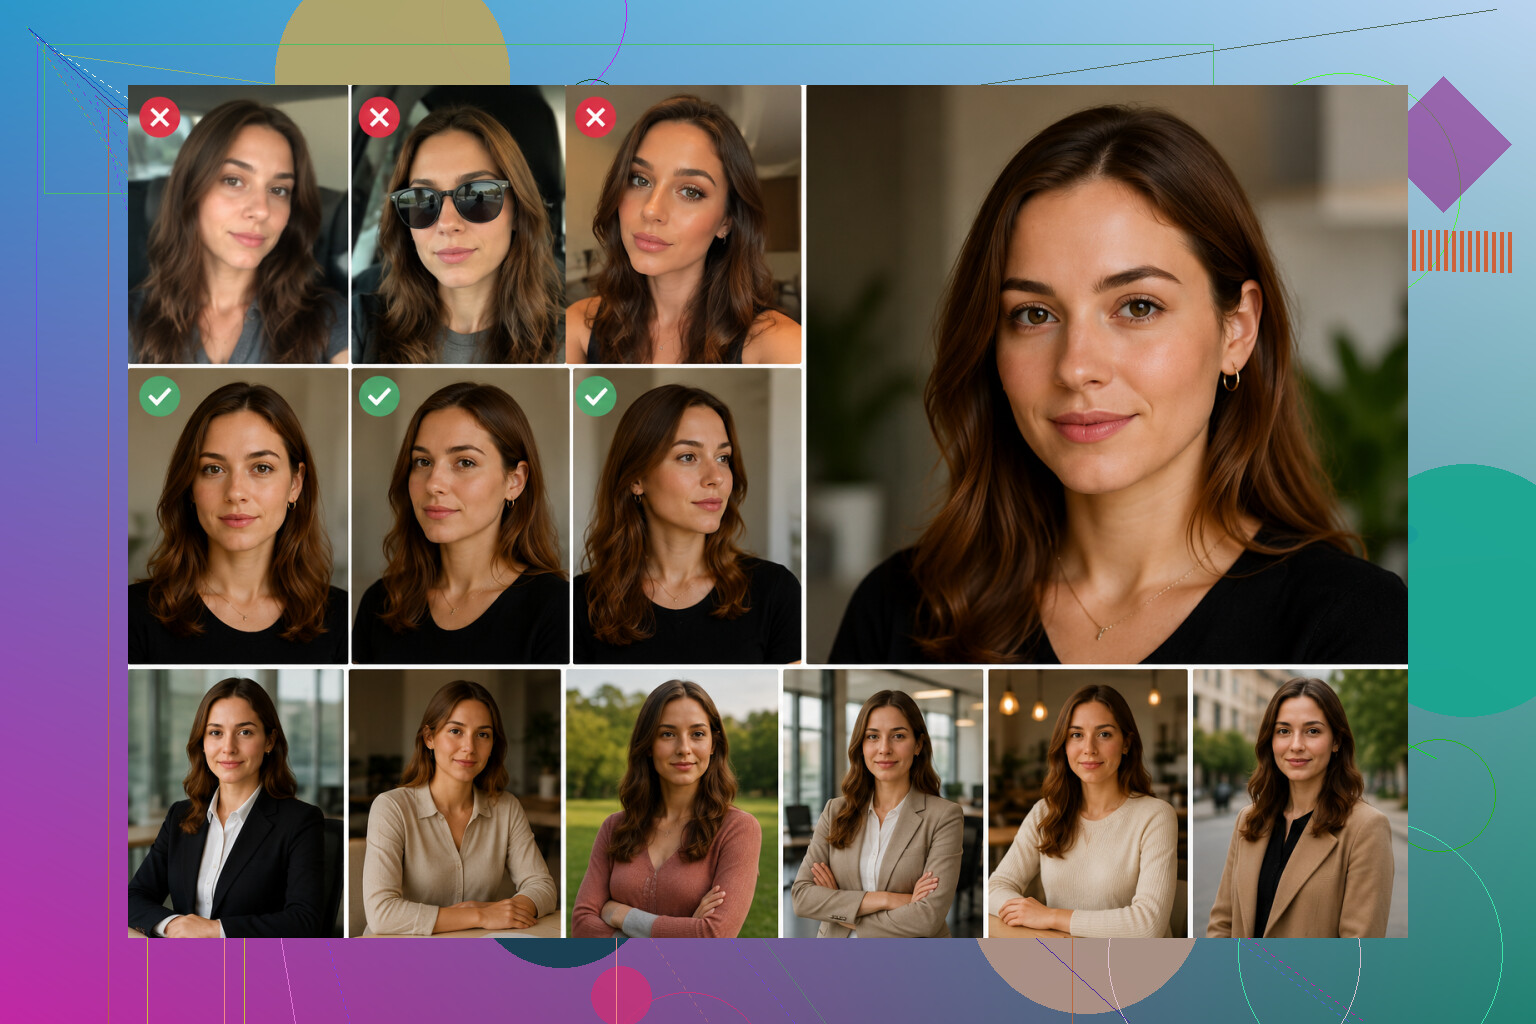
The template choice matters too. Some styles push the model into fake-looking skin, stiff poses, or odd face geometry. I had the most luck with plain business headshots, simple outdoor shots, and low-drama lifestyle sets. Those stayed closer to a normal human face. I’d generate a batch, then throw out most of them. Eyes first. Then skin texture. Then the shape of the nose, jaw, and smile. The first image is often not the one you keep. Mine usually wasn’t.
And yeah, the app changes everything. Same selfies, different tool, different face. I’ve seen one app make me look waxy and another one keep pores, eye detail, and better proportions. So if your results look fake, it might not be your photos. It might be the engine.
One option I tried was Eltima AI Headshot Generator app. What stood out to me was its narrow focus. It sticks to portrait-style output, so the results felt more stable from image to image. I didn’t need to mess with prompts or babysit settings for half an hour.
The flow is simple. You upload your selfies first. The app builds a model from those. After that, you pick a style pack and let it render a set. The packs I found most useful were the clean work ones and the less staged casual ones:
LinkedIn Headshots, for straightforward profile photos.
Corporate or Business Portraits, for office-style images with a stricter look.
Casual Lifestyle, for everyday photos without the fake studio vibe.
Social or Instagram-style packs, if you want something less formal.
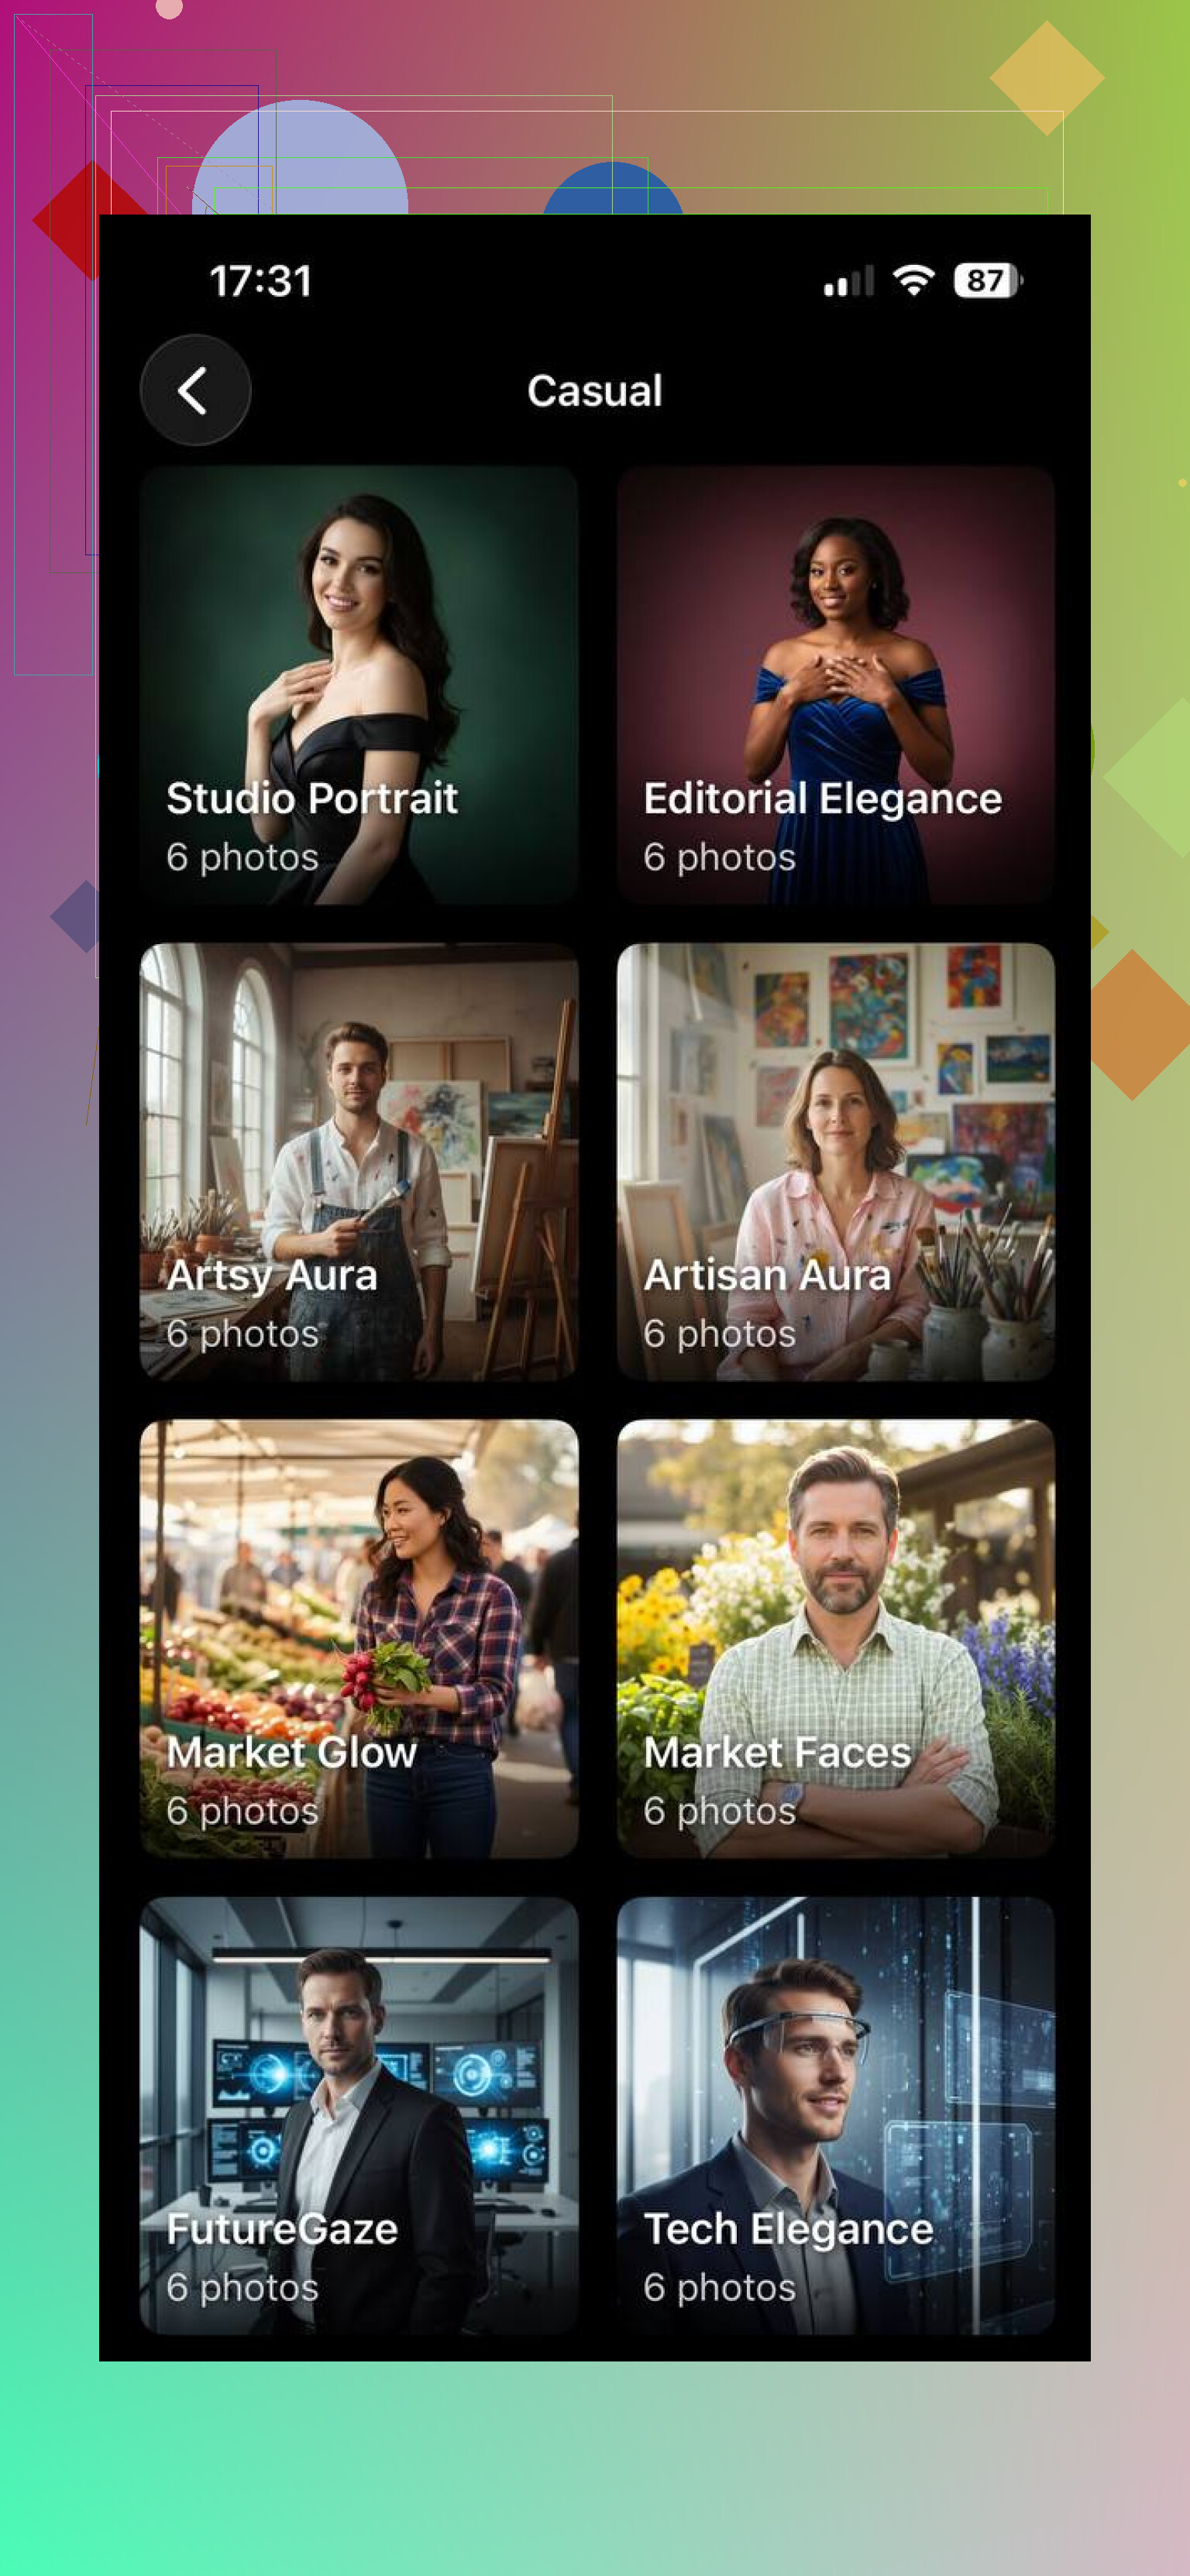
Using the Eltima AI app is pretty direct. Upload a varied set of selfies. Wait while it builds your profile. Pick one or two packs. Generate a batch. Keep the shots where your eyes line up right, your skin still looks like skin, and your face doesn’t drift into that plastic AI look. I got better picks when I mixed packs instead of staying in one lane the whole time. One pack gave me a decent work photo, another gave me a more natural face. Combining them worked better for me than forcing a single style.
13 Likes
A lot of fake-looking AI photos come from overcooked settings, not only bad inputs. I agree with @mikeappsreviewer on source images, but I disagree a bit on relying on style packs too much. Packs often bake in plastic skin and stock-photo lighting.
What helped me more:
- Lower prompt intensity or stylization. High stylization ruins pores and face shape fast.
- Ask for camera realism, not beauty terms. Use stuff like: 50mm lens, natural skin texture, uneven pores, soft window light, mild shadows, realistic catchlights.
- Add negatives. “No waxy skin, no extra fingers, no perfect symmetry, no over-sharpening, no blurred ears, no glossy eyes.”
- Keep skin imperfect. A tiny blemish or under-eye texture sells realism.
- Match lighting direction. If light hits from left, shadows need to fall right. AI messes this up al lthe time.
- Fix the image after gen. Lightroom or Photoshop helps more than people admit. Lower clarity on skin only. Add fine grain, around 10 to 20. Pull back highlights. Warm skin by a small amount.
- Check hands, teeth, earrings, glasses rims, shirt collars. Those details snitch first.
One trick people skip, downscale the final image a bit. 4K exposes every weird artifact. A clean 2048px file often looks more real tbh.
I mostly agree with @mikeappsreviewer and @viaggiatoresolare, but I think people overfocus on prompts and underfocus on camera logic. Real photos look real because they obey physics. If your AI image has perfect skin, razor sharp hair, blurry earrings, dead-flat lighting, and zero lens behavior, it screams fake fast.
What helped me:
-
Add lens flaws on purpose
Slight depth falloff, tiny motion softness, subtle chromatic aberration, mild sensor noise. Not heavy. Just enough. -
Stop centering everything
AI loves dead-center symmetry. Real portraits usually have a little imbalance in framing, posture, or eye alignment. -
Use believable wardrobe/background combos
A studio blazer with a messy bedroom bg looks off. Same with outdoor golden hour plus office reflections in glasses. Keep the scene logic tight. -
Don’t over-retouch after generation
This is where a lotta people kill realism. Too much denoise, skin smoothing, whitening teeth, boosting eyes. Instant mannequin. -
Use reference images for color grading
Not just face refs. Pull tone from actual DSLR or phone portrait shots so the final image has normal contrast and white balance.
Also, I kinda disagree that downscaling always helps. Sometimes it hides flaws, sure, but sometimes it just turns weird texture into muddy skin. Better to fix the realism first, then resize.
Biggest giveaway for me? Hairline, ears, and clothing folds. If those are wrong, the whole pic feels cursed lol.
Use a real photo as the base, then apply AI only to the background, clothing, or color grade. Keep your face, hands, hairline, and ears untouched.
Take a phone portrait near a window. Use Portrait mode at 2x zoom. Import it into Photoshop or another editor. Mask the person, replace the background, then adjust shadows to match.
This avoids alot of wierd skin and facial errors because AI never rebuilds your identity. For headshots, this method is faster and usually looks more believable than generating the full image.
The thing nobody warns you about is identity drift across a set. You can make a single image look completely real, then generate nine more and quietly turn into a slightly different person in each one. Different jaw width, different eye spacing, hairline creeps up. On its own each shot passes, but line them up and it reads as fake because no real human changes bone structure between photos. So if you’re building a profile or a batch for anything, judge them as a group, not one at a time.
@serg_data has the most reliable approach here honestly. Keeping your real face and only letting AI touch the background or grade sidesteps the whole identity problem. It’s less impressive-sounding but it fails way less often. The tradeoff is you’re limited to poses and angles you actually shot, so it’s great for a headshot and useless if you wanted five different scenes.
On the downscaling debate, I lean toward @sternenwanderer. Shrinking the image is just hiding evidence. If the skin texture is muddy or the ear is melted, a smaller file doesn’t fix that, it just makes it harder to notice until someone opens it full size. Fix it first.
The detail I’d add that got skipped: catchlights have to agree with each other. Both eyes should show the light coming from the same place and roughly the same shape. AI loves giving you two different reflections, one soft window on the left eye and some random bright dot on the right. People don’t consciously notice it but it’s a big reason a face feels slightly off. Zoom into the eyes before you keep anything.
Style-pack tools like the Eltima one make sense as a starting point if you don’t want to fiddle with prompts, but I wouldn’t expect the raw output to be the finished thing. Treat it as a draft you still clean up.