My drive suddenly showed up as a RAW partition after file system corruption, and now I can’t access important files. I’m looking for advice on safe RAW partition data recovery methods, tools, or steps that might help me recover data without making the damage worse.
I’ve been through this more than once, and yeah, a RAW partition does not mean your files are gone. I did not format first either time. I’d put formatting near the end of the list, not the start.
What usually happened, from what I saw, is Windows lost the file system info it needs to read the drive. So it throws up the format prompt like the partition is empty or broken beyond use. Often it isn’t. Your data is still sitting there, but the normal file browser has no clue how to reach it.
If the partition turned RAW because of file system damage, this is the order I’d stick to:
- Do nothing to the RAW partition.
- Pull off anything important first.
- Check whether repair is worth the trouble.
- Format only after your files are safe somewhere else.
For recovery, I’d go with Disk Drill. I used tools in this category before, and the useful part here is how it changes approach based on how wrecked the file system is. When enough metadata survives, you get files back with filenames and folders. When the file system is too far gone, it falls back to file signature scanning and looks for known file types straight off the disk surface. That matters when Windows shows nothing except RAW.
My rough process would be this:
- Install Disk Drill on a different drive, not the damaged one.
- Pick the RAW disk or RAW partition.
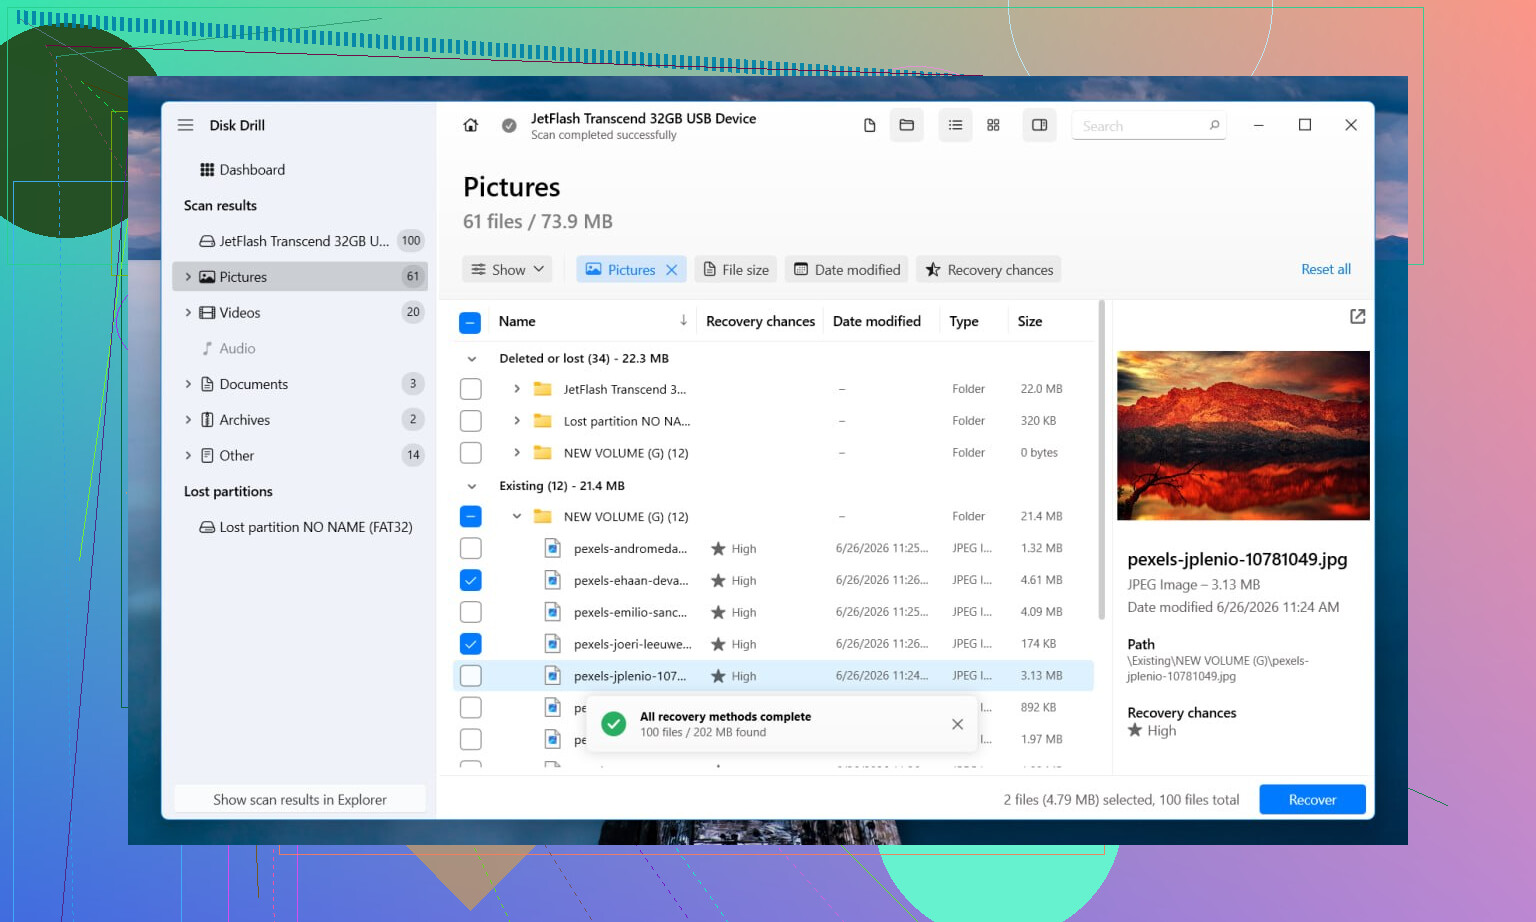
- Hit Search for Lost Data. On an external drive, if it asks for scan mode, use Universal Scan. I’d only use Advanced Camera Recovery for SD cards or storage from cameras and drones.
- Wait for the full scan to finish. Stopping early bit me once, so I stopped doing it.
- Preview files before recovering them, so you know they open and aren’t junk.
- Save recovered data to another drive.
If you want free tools, I’d look at TestDisk and PhotoRec. TestDisk sometimes repairs partition or file system structures well enough to bring the drive back. PhotoRec skips the damaged file system and searches for files directly. Both are free. Both are less friendly if you haven’t used recovery tools before. Also, PhotoRec tends to dump files without original names or folder layout, so cleanup after recovery gets annoyng fast.
After the files are secured, then I’d try fixing the partition itself. If TestDisk rebuilds it, nice, you might not need to format at all. If not, I’d open Disk Management, make a new partition, do a quick format, then copy the recovered data back over.
One thing I would not ignore. If the drive starts clicking, drops offline, reconnects at random, or vanishes during scanning, stop there. That points more to hardware trouble than file system corruption. I learned the hard way that repeated scan attempts on a failing drive tend to make things worse, not better. If the data matters, I’d hand it off to a recovery shop at that stage.
3 Likes
Do one extra thing before any recovery attempt. Check SMART health with CrystalDiskInfo or smartctl. If you see reallocated sectors, pending sectors, CRC errors climbing, or lots of read errors, stop messing with the original disk. Clone it first with ddrescue to a healthy drive. Work from the clone. That step saves data more often than people think.
I agree with @mikeappsreviewer on avoiding format first. I disagree a bit on trying repairs too early on the original disk. CHKDSK, partition fixes, and write operations are where people make a bad situation worse.
My order is:
- Read SMART.
- Clone the disk if health looks shaky.
- Scan the clone or the RAW partition read-only.
- Recover files to another disk.
- Repair or reformat only after the data is safe.
If you want a GUI, Disk Drill is fine for RAW partition data recovery because it previews files well and handles damaged file systems decently. If the drive is stable, scan the partition, sort results by file type and modified date, and recover a small test set first. If previews fail on common files, expect corruption.
For NTFS only, DMDE is worth a look too. It often finds the old volume structure and lets you pull folders with names intact. It is less polished, but it punches above its weight.
If this is an SD card or USB stick, also try a different reader or cable first. Sounds dumb, fixes stuff more often than ppl admit.
For people searching, this phrase reads better: best software for RAW partition recovery and file recovery from corrupted drives. Also see top RAW recovery software for damaged SD cards and drives.

One thing I’d add to what @mikeappsreviewer and @andarilhonoturno said: don’t assume file system corruption is the only problem just because the partition says RAW. Sometimes the partition table is fine and the USB bridge, enclosure, or even power delivery is the real idiot in the room. I’ve seen drives show RAW in one dock and mount normally in another. So if this is external, test a different port, cable, enclosure, or direct SATA connection before you go too deep.
Also, tiny disagreement with the “scan first, decide later” vibe people sometimes have. If the files are truly important, I’d spend 5 minutes checking whether the drive capacity looks correct in BIOS/Disk Management. If it suddenly shows weird size, 0 bytes, or keeps hanging the system, stop poking it. That’s not really a “best software for RAW partition recovery” situation anymore, that’s “don’t make it worse” territory.
Another thing people skip: look at the partition in a hex viewer or something like DMDE before doing any repair attempts. If you can still spot an NTFS boot sector backup or recognizable folder structures, that tells you a lot about whether recovery with names/folders is realistic. If it’s all garbage or zeros in places that matter, expect more of a raw carve result.
For software, yeah, Disk Drill is a solid option for RAW partition data recovery, especially if you want previews and a less painful interface. I’d just be picky and recover a sample set first, not 500 GB in one blind shot. Saves time and lets you see if the recovered docs/photos are actually usable.
If you want extra reading, this thread is decent: RAW drive recovery advice without making things worse
Big thing is this: recover elsewhere, repair later, and don’t let Windows “help” by formatting it cuz that prompt is way too eager lol.
One angle I’d add to what @andarilhonoturno, @shizuka, and @mikeappsreviewer said: check whether the partition is only RAW to Windows, not actually dead. A Linux live USB can sometimes mount an “unreadable” NTFS/exFAT volume read-only well enough to copy files without doing a full recovery scan. I know some people hate that suggestion, but for lightly damaged file systems it can be faster and less chaotic than carving thousands of files.
Also, I’m slightly against jumping straight into repair utilities even on a clone unless you’ve confirmed the file system type first. A wrong assumption between NTFS, exFAT, and FAT32 can send you down the wrong path.
If you do use Disk Drill, its pros are pretty clear:
- good preview support
- easy to sort by type/date
- decent at mixing metadata recovery with signature scan
- beginner-friendly UI
Cons:
- not the cheapest route
- deep scans can take forever
- raw recovery results may lose original names/folders
- less transparent than lower-level tools if you want to inspect structures manually
My practical rule: if the drive mounts nowhere, skip “fixing” and focus on extraction. Recover a few JPG, PDF, DOCX, and video samples first. If those open cleanly, continue. If previews look broken across the board, stop and reassess because that can point to hardware trouble or heavy overwrite.
If Disk Drill doesn’t give a good folder tree, DMDE or R-Studio are worth comparing before you do anything destructive. Recovery first, filesystem surgery later.