I accidentally deleted important files from my hard drive and realized I need them back for work. I’m not sure what to do first to avoid making things worse or overwriting the data. What are the best first steps for hard drive file recovery, and is there a safe recovery method I should try?
Take a breath first. I know the stomach-drop feeling when files vanish, especially stuff you needed, but deleted on a hard drive does not always mean erased for good. If you move fast and stop making it worse, your odds are decent.
The first thing I did the last time this happened was stop using the drive right away. Do not save anything to it. Do not install stuff on it. If the missing files were on your main system drive, I would even stop normal browsing there. The reason is simple. When you delete a file, Windows or macOS usually marks the space as free. The old data often still sits there until new data lands on top of it. Every write makes recovery harder. So yeah, stop using the drive. Dead stop.
Figure out which drive lost the files
- External drive or secondary internal drive: this is the easier case. Unplug it, connect it to another computer, and scan it there. You avoid adding new writes to the same disk.
- Main OS drive: this gets messy faster. Boot from a USB drive, or connect the disk to another machine if you can. The goal is the same, keep new activity off the drive holding the deleted data.
Run recovery software, and do it soon
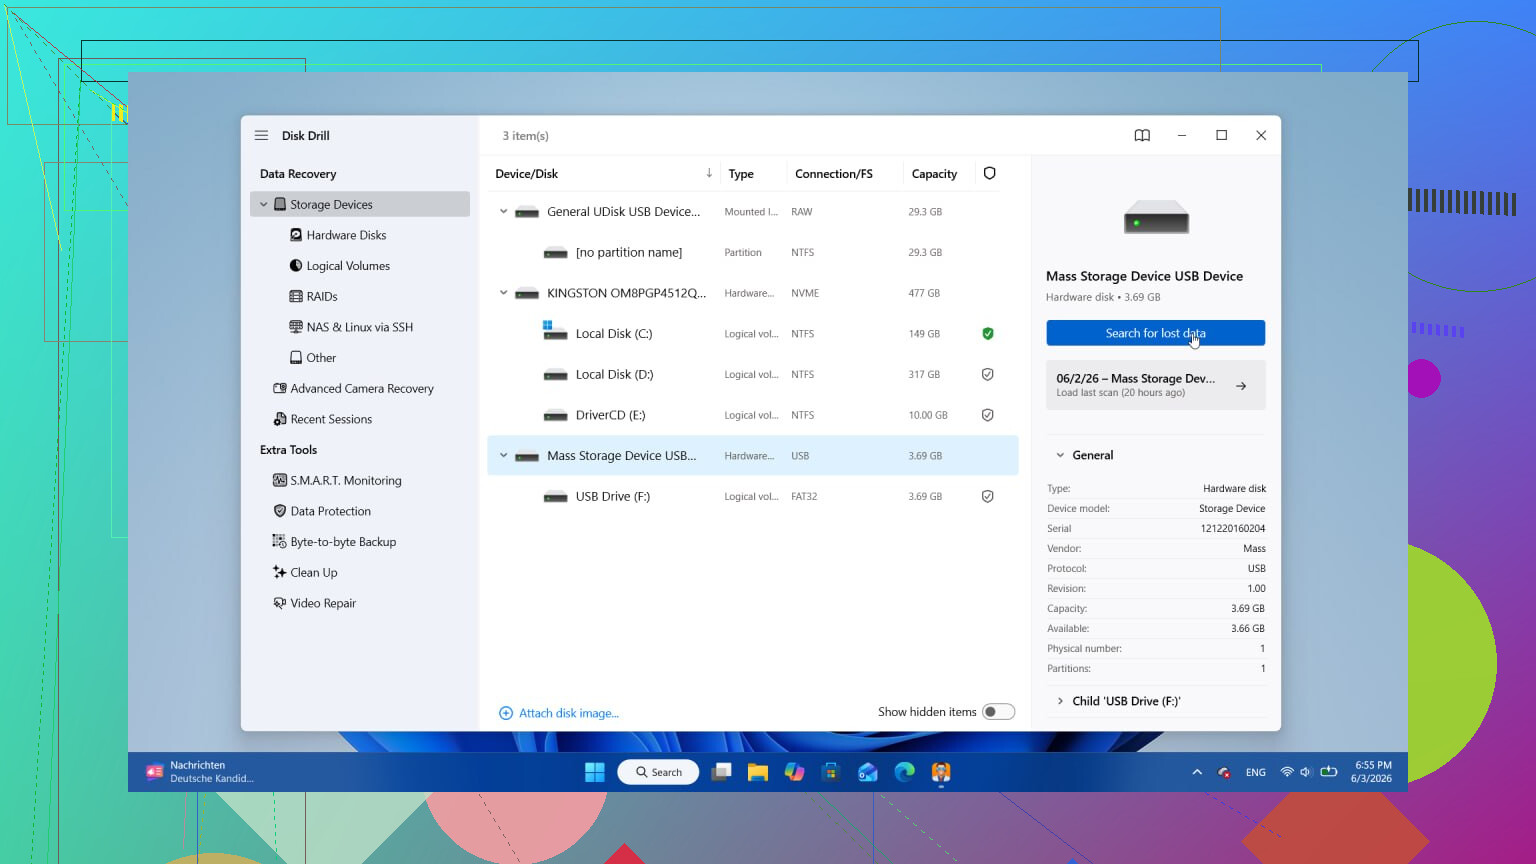
This is where I’ve seen the best results, mostly when the deletion was caught early. I’ve tried a few tools over time. The one I kept going back to was Disk Drill. It scans for files beyond the stuff you deleted five minutes ago, and the preview view helped me avoid restoring garbage with the right filename but broken contents. The free version lets you scan and preview, then you pay if you want to recover.
One thing people mess up all the time, install the recovery app to a different drive. Not the one you are trying to save files from. If you write the tool onto the same disk, you risk overwriting the data you wanted back. I did this wrong once years ago. Bad idea.
A few things worth knowing before you start
- Hard drives usually give you a better shot than SSDs. Old-school HDDs tend to be more forgiving. Still, some newer hard drives support TRIM, so I would not sit on it for hours thinking the files will wait for you.
- If the drive clicks or grinds, stop. Software is not your fix at that point. That noise points to hardware trouble, and a recovery lab is the next step.
- Do one solid scan, not ten random ones. Re-running scans over and over usually wastes time. I’ve had better luck doing one thorough pass, checking previews, then recovering whatever still looks intact.
If you caught it early, there’s a fair chance you get the files back. Keep it calm, be picky about where you write data, and don’t poke the drive more than needed.
4 Likes
First thing, check the easy stuff before you start recovery. I know @mikeappsreviewer covered the stop-using-the-drive part, and I agree with most of it. I only disagree a bit on jumping straight into a big scan before you verify the file was not moved, synced away, or sitting in a hidden temp folder.
Do these first, in order.
- Check Recycle Bin or Trash.
- Search by file name and file type.
- Check your cloud sync trash, OneDrive, Google Drive, Dropbox, iCloud.
- Check recent files in the app you used, Word, Excel, Photoshop, whatever.
- Check File History, Previous Versions, Time Machine, or backup software.
Those steps take 5 to 10 minutes. Sometimes the file is not gone, it was moved or replaced. For work files, Office apps also save temp and autorecovery copies. Look there before doing anything heavy.
After that, make a copy of the drive first if the files matter a lot. This part gets skipped too often. A disk image gives you one stable source to work from. If recovery software messes up, or the drive starts failing, you still have the image. Pros do this for a reason. If the drive is healthy, image it to another disk with enough free space.
Then scan the image, not the original drive, if your tool supports it. Disk Drill is fine for this and it is easy for most people. Recover the files to a different drive. Not the same one. Yeah, sounds obvious, people still do it and then wonder why the recovered file opens as gibberish. Been there, dumb mistake.
If this is an SSD, move fast. Deletion on SSDs tends to go bad faster because of TRIM. On old HDDs, odds are often better if no new data hit the same sectors.
If the files are worth more than a few hundred bucks, skip DIY after the backup checks and send it to a lab. Especially if it is a work deadline and you cant afford a bad recovery attept.
Also, this is a solid quick watch on deleted file recovery basics, deleted hard drive file recovery tips.

One small add to what @mikeappsreviewer and @stellacadente said: before you do any recovery attempt, check the drive’s health. I would not keep hammering a dying disk with scans just because the files were “only deleted.” If SMART shows warnings, or the drive is slow, disappearing, or making weird noises, stop messing with it. Imaging first is smarter than scanning first, imo.
Also, if this was deleted from a network share, synced folder, or company-managed work PC, check retention policies and admin-side restore options. A lot of people forget IT may be able to restore it way faster than DIY tools.
One thing I kinda disagree on is doing a bunch of manual searching if time matters and you already know it was deleted. A quick check of Recycle Bin and backups, sure. But after that, every extra minute on the original machine is still more activity.
My order would be:
- Stop using that drive.
- If it’s the system drive, shut down and work from another machine/boot media.
- Check SMART/health.
- Make an image if the files are important.
- Run recovery from the image or from another computer.
- Recover to a different drive.
Disk Drill is a solid option because it’s simple and previews recoverable files, which saves time. Just dont install it onto the same drive you’re trying to recover from.
Also, this might help if you want more discussion around external drive recovery stuff: practical external hard drive file recovery tips from real users.
If it’s an SSD, move fast. If it’s clicking, stop. If it’s business-critical, skip the hero stuff and send it to a lab. Thats usually the least expensive “expensive” option.

One thing I’d add to what @stellacadente, @andarilhonoturno, and @mikeappsreviewer already covered: verify the deletion type. Shift+Delete, emptied Trash, app overwrite, and format are not the same situation. If the file was overwritten by a newer save, recovery odds drop a lot compared with a normal delete.
Also, I slightly disagree with doing a full deep scan immediately if this is a healthy drive and you know the exact file type. A targeted scan or narrowing by extension can save time and reduce the pile of false positives you have to sort through.
My practical checklist:
- Note the original file name, folder, app used, and approximate save time.
- Check whether the app keeps local autosaves, lock files, or project caches.
- Look at file system type if you know it. NTFS, exFAT, APFS, etc. Some tools do better on certain file systems.
- If this is company data, pause and ask IT before self-recovery. You may create compliance problems by restoring sensitive files onto a personal disk.
- If encryption was enabled and you do not have the key, recovery can succeed technically but still leave you with unusable data.
About Disk Drill specifically:
Pros:
- Easy UI
- Good preview feature
- Fine for quick triage
- Can recover to another drive without much setup
Cons:
- Deep scans can return lots of clutter
- Best features are behind the paid version
- Not my first pick for badly damaged drives
- Previewable does not always mean fully intact
So yes, Disk Drill is a reasonable first software option after the non-invasive checks, especially for ordinary accidental deletion. Just do not judge success by filenames alone. Open recovered docs, compare file sizes, and validate the contents before you relax. That part gets skipped a lot.