I accidentally permanently deleted important files on my Windows 11 PC and already emptied the Recycle Bin. Some of these documents and photos are really important for work and personal records, so I need help figuring out the best way to recover deleted files in Windows 11 before they’re overwritten. Any advice on safe recovery methods or tools would really help.
Hey,
I’ve had this happen on Windows 11, and “permanently deleted” usually does not mean the file vanished on the spot. Most of the time, Windows removes the reference first. The data often sits there until something else writes over it.
So before you throw recovery tools at the drive, I’d check the boring stuff first. I know, nobody wants to, but I’ve found files there more than once.
- Recycle Bin. I’ve seen files land there even when I swore I used Shift+Delete.
- OneDrive Recycle Bin, if your Desktop, Documents, or Pictures sync there.
- File History backups.
- Previous Versions on the folder where the file used to live.
- Any other backup spot, old external drive, NAS, cloud account, or a second PC where you copied the file once and forgot.
The big thing, stop writing to the drive if you can. Don’t install random recovery apps onto it. Don’t dump downloads on it. Don’t move files around. Every write cuts into your odds. On SSDs, this gets worse because of TRIM. Once TRIM has cleaned blocks, recovery gets ugly fast, sometiems impossible.
If all the backup checks come up empty, then I’d move to recovery software.
The one I’d try first is Disk Drill. I used it on a wiped USB drive and later on a Windows partition where I deleted a folder by mistake. It was easier to sort through than a lot of the old-school tools. When the file system info is still there, it often keeps filenames and folder paths, which saves a ton of time.
What I’d do:
- Install Disk Drill on a different drive, if possible.
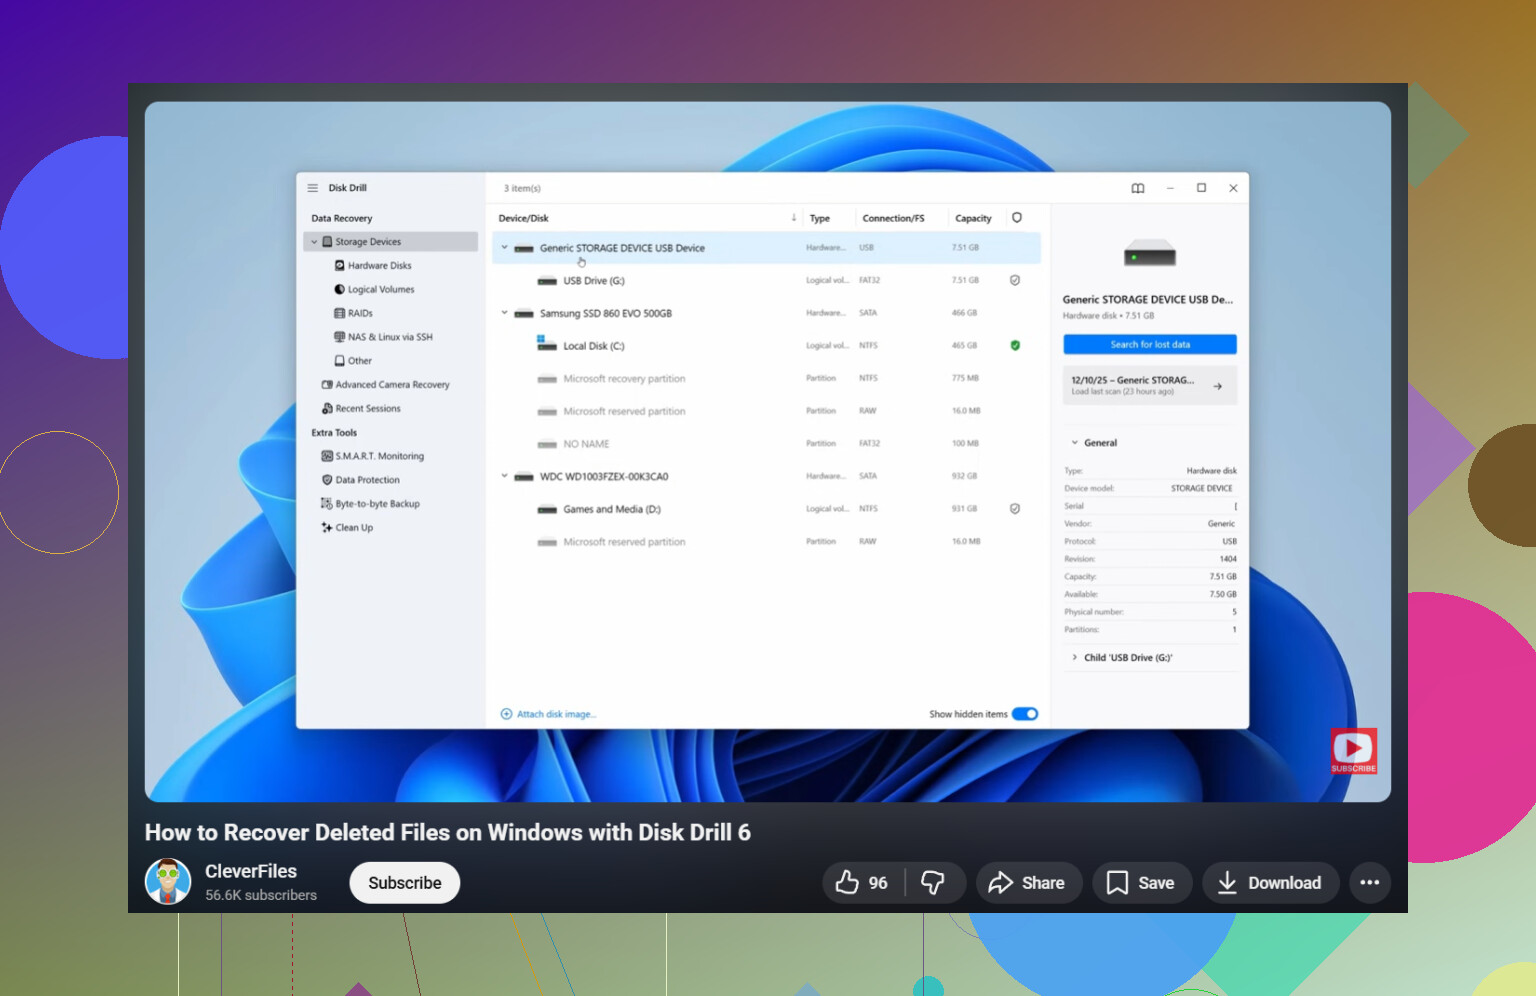
- Run it and pick the drive where the missing files were stored.
- Hit Search for Lost Data and let the scan finish. Don’t stop halfway unless you have to.
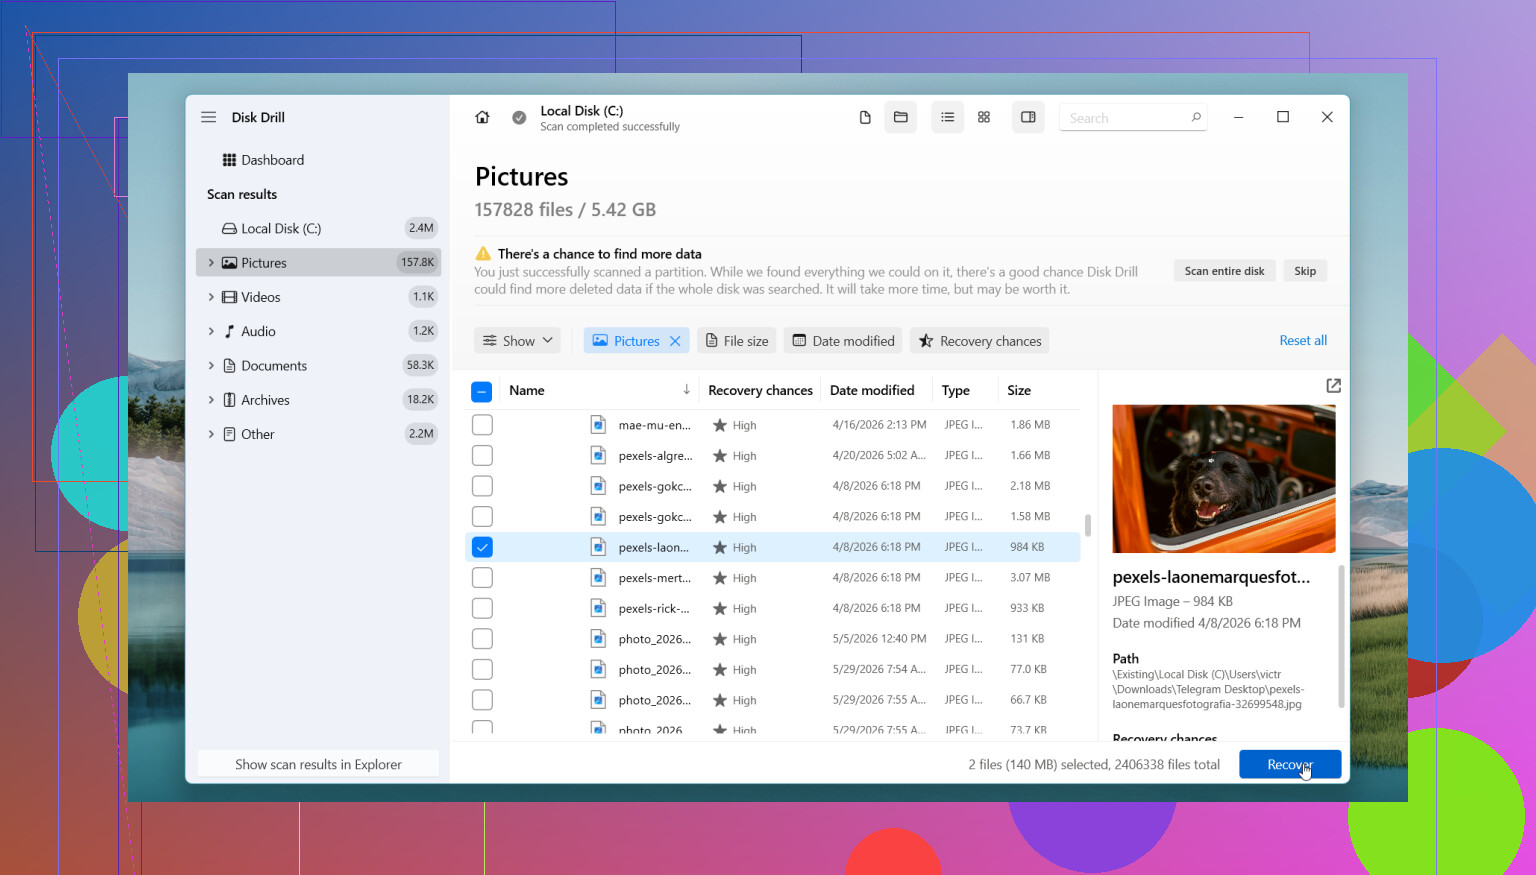
- Use search and filters to narrow the mess down.
- Preview files when the option shows up.
- Recover the files to another drive, not back onto the same one.
The free Windows build lets you scan and preview without limits, and it recovers up to 100 MB. For small docs or a test run, that’s enough to see whether the files are still there before spending money.
If you want a free route, PhotoRec still works. I’ve used it too. It pulls back a lot, but the tradeoff is rough. You often lose original filenames and folder layout, so you end up digging through piles of recovered files with names like f123456.jpg. Good tool, messy output.
There’s also a point where I’d stop doing DIY stuff and hand it off.
- The drive clicks, grinds, or makes any new noise.
- Windows stops seeing the drive.
- The drive drops out at random.
- The SSD or HDD looks physically damaged.
- The files matter enough where one bad step is too much risk.
- Recovery software finds nothing useful.
I learned this one the hard way on an old HDD. Repeated scans and reconnects made it worse. If the hardware itself is failing, more attempts at home are not always the smart move.
So yeah, check backups first. Keep use of the affected drive near zero. Then scan with something sensible. If the drive looks sick, stop early and send it to a pro. Timing matters a lot here.
11 Likes
First thing, check where the files were stored. If they were on your C: drive and it is an SSD, your odds drop fast because of TRIM. I slightly disagree with @mikeappsreviewer on one part. I would not spend too long trying a pile of tools if the files are business-critical. Time matters more than testing five apps.
What I’d do on Windows 11:
- Stop using the PC for anything extra.
- If possible, shut it down.
- Remove the drive and connect it to another PC as a secondary drive, or boot from a USB OS.
- Make an image of the drive first, if the files matter a lot. Tools like Macrium Reflect or dd work for this.
- Run recovery against the image, not the original drive.
Why image first? Because every scan reads the disk a lot, and if the drive has weak sectors, repeeated passes are a bad idea.
For software, Disk Drill is a solid pick because it sorts results better than a lot of older recovery apps. That matters when you are looking for docs and photos fast. If Disk Drill shows original names and folder paths, recover those first. Highest value first. Save recovered files to a different disk. Not the same one. Ever.
Also check this if you want a simple walkthrough for Windows file recovery:
step by step deleted file recovery on Windows 11
One more thing people forget. Office apps and Adobe apps often leave temp or autorecovery copies in AppData. Search for file extensions and recent dates. I got back a lost Excel file this way once, total fluke tbh.
If the drive clicks, vanishes, freezes Explorer, or SMART stats look bad, stop DIY. That’s where peope make it worse.
One angle I’d add that @mikeappsreviewer and @suenodelbosque only kinda touched on: check app-specific history, not just Windows backups. For docs, Word, Excel, Photoshop, Lightroom, even Notepad++ can leave autosaves, temp caches, or “recent” copies in weird places. I’ve recovered stuff from %AppData%, %LocalAppData%, and Office’s recovery folders when the “real” file was gone.
Also, if this was deleted from a network share, USB stick, SD card, or external drive, recovery behavior can be different than your main Windows 11 SSD. External media usually gives you better odds than an internal SSD that already fired off TRIM. So I slightly disagree with the doom vibe some ppl get about recovery. It’s not always over.
Another thing: open Event Viewer or your cloud sync app logs if you had sync turned on. Sometimes you can confirm the exact deletion time and figure out whether a synced copy existed before the purge. Boring? yes. Useful? annoyingly yes.
If you do scan, I’d still put Disk Drill near the top because its preview/sorting is actually less painful than a lot of recovery tools. But I would prioritize by file type:
- docs/spreadsheets first
- irreplaceable photos second
- large video files last
Large files are more likely to come back corrupted anyway.
And if you want more practical Windows 11 deleted file recovery tips and recovery options, that thread is worth skimming too.
One last bit: if the deleted files were in a folder indexed by Windows Search, search for exact phrases from the docs or partial filenames. Sometimes the file is gone but a cached trace helps you narrow down what to recover. Weird trick, but it helped me once when I was panicing and half-awake.
One thing I’d add to what @suenodelbosque, @espritlibre, and @mikeappsreviewer covered: use Windows File Recovery from Microsoft before you go too deep into commercial tools. It is ugly, command-line only, and not beginner-friendly, but on some NTFS deletions it can pull back docs and photos without installing a full recovery suite. Best used from another drive or boot setup.
I slightly disagree with the “image first no matter what” advice for every case. If the drive is healthy and this is just a normal accidental delete, making a full image of a huge disk can eat precious time and stress people out. For truly critical data, yes, image first. For a simple recent delete on a healthy external HDD or USB, a quick targeted recovery pass is sometimes the more practical move.
A few extra places to check that people skip:
- Email attachments you sent or received
- Printer/scanner software save folders
- Messenger apps like Teams, Slack, WhatsApp desktop export folders
- Browser download history, because the file may still exist under a weird name
- Recent files lists inside Office apps
C:\Users\YourName\AppData\Local\Temp- Hidden thumbnails or cached previews for photos, useful for confirming what existed
If you try Disk Drill, the pros are pretty clear:
- easy filtering by file type and date
- preview works well
- decent at keeping folder structure when metadata survives
- much easier to sort than PhotoRec
Cons:
- free recovery limit on Windows is small
- deep scans can return a lot of junk
- not magic on TRIMmed SSDs
- paid version may not be worth it if the drive is already physically failing
Competitor-wise, PhotoRec is powerful but messy, Recuva is simple but feels dated in tougher cases, and R-Studio is excellent but overkill for a lot of home users.
My order would be: check hidden duplicate sources, try Windows File Recovery if you are comfortable, then use Disk Drill for easier triage. If nothing meaningful appears fast, stop experimenting. That usually means backup recovery or a lab.